Sunday, June 26, 2011

Mulch ThoseTomatoes

Last year's parsley is going to seed but some Black Swallowtail caterpillars have taken up residence so the plants will get to stay as their home - share for beauties sake.
The greenhouse cucumber is off and growing nicely.
This is the newly mulched tomato patch.
The twine that the plants are trained on is the best material and it composts easily too.
Down on the floor of the greenhouse whats left of the grafts are struggling.
Garlic flower stalks are curled and need to be cut to allow the garlic to make large heads.
But these are the first harvest of your crop so put them to good use.

The rain finally quit after Wednesday to allow for a bit of drying out. The tomato patch was finally dry enough for me to put the straw mulch down between the rows. Tomatoes are best grown with a nice deep mulch that keeps them with constant moisture which will best of all eliminate the dreaded black spot. Yes, calcium is important but even if you add calcium, which you really don't need to do, if the plants go through water stress you will get blossom end rot. Mulch, however, is the key to eliminating this problem. Keep your plants evenly watered and mulched and tomatoes will be happy in your garden. The same is true for potted tomato plants. Keep the pots cool by covering them or putting other pots in front of them to keep the soil temperature low. Potted plants usually need to be watered twice a day morning and evening and in real hot weather maybe even more. As soon as you stress potted tomatoes you will develop those black spots on the underside of your fruits - its the lack of water getting to the cells of the fruit with the suspended calcium in it. So mulch and water are your friends for your tomato crops.
The garlic is making flowers so its time to cut those off. They are edible and I cooked some tonight mixed with onions to garnish our hot dogs - yum yum. Garlic flower shoots store well so you can cut them, put them in a plastic bag and into the vegetable bin in the refrigerator for at least 2 week of use. Mince some into your scrambled eggs. You can cut them off and toss them but they are your first garlic harvest from your growing crop so why not eat them.
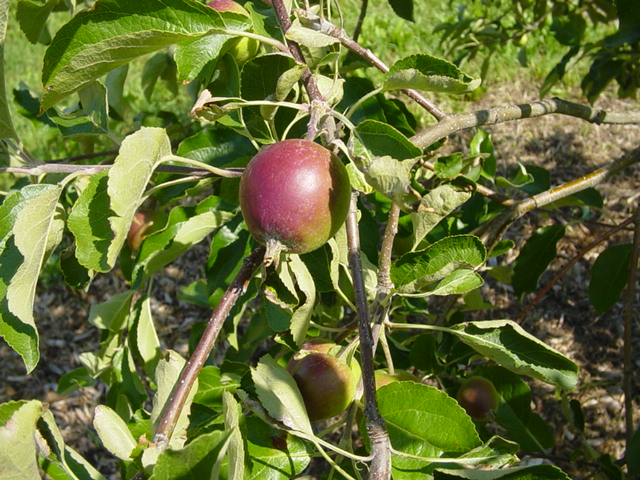
I am still working on bagging the apples. I want to get that job done before the coddling moths start laying eggs at the ends of the fruits. Looks like I will be at it now that the tomatoes are done.
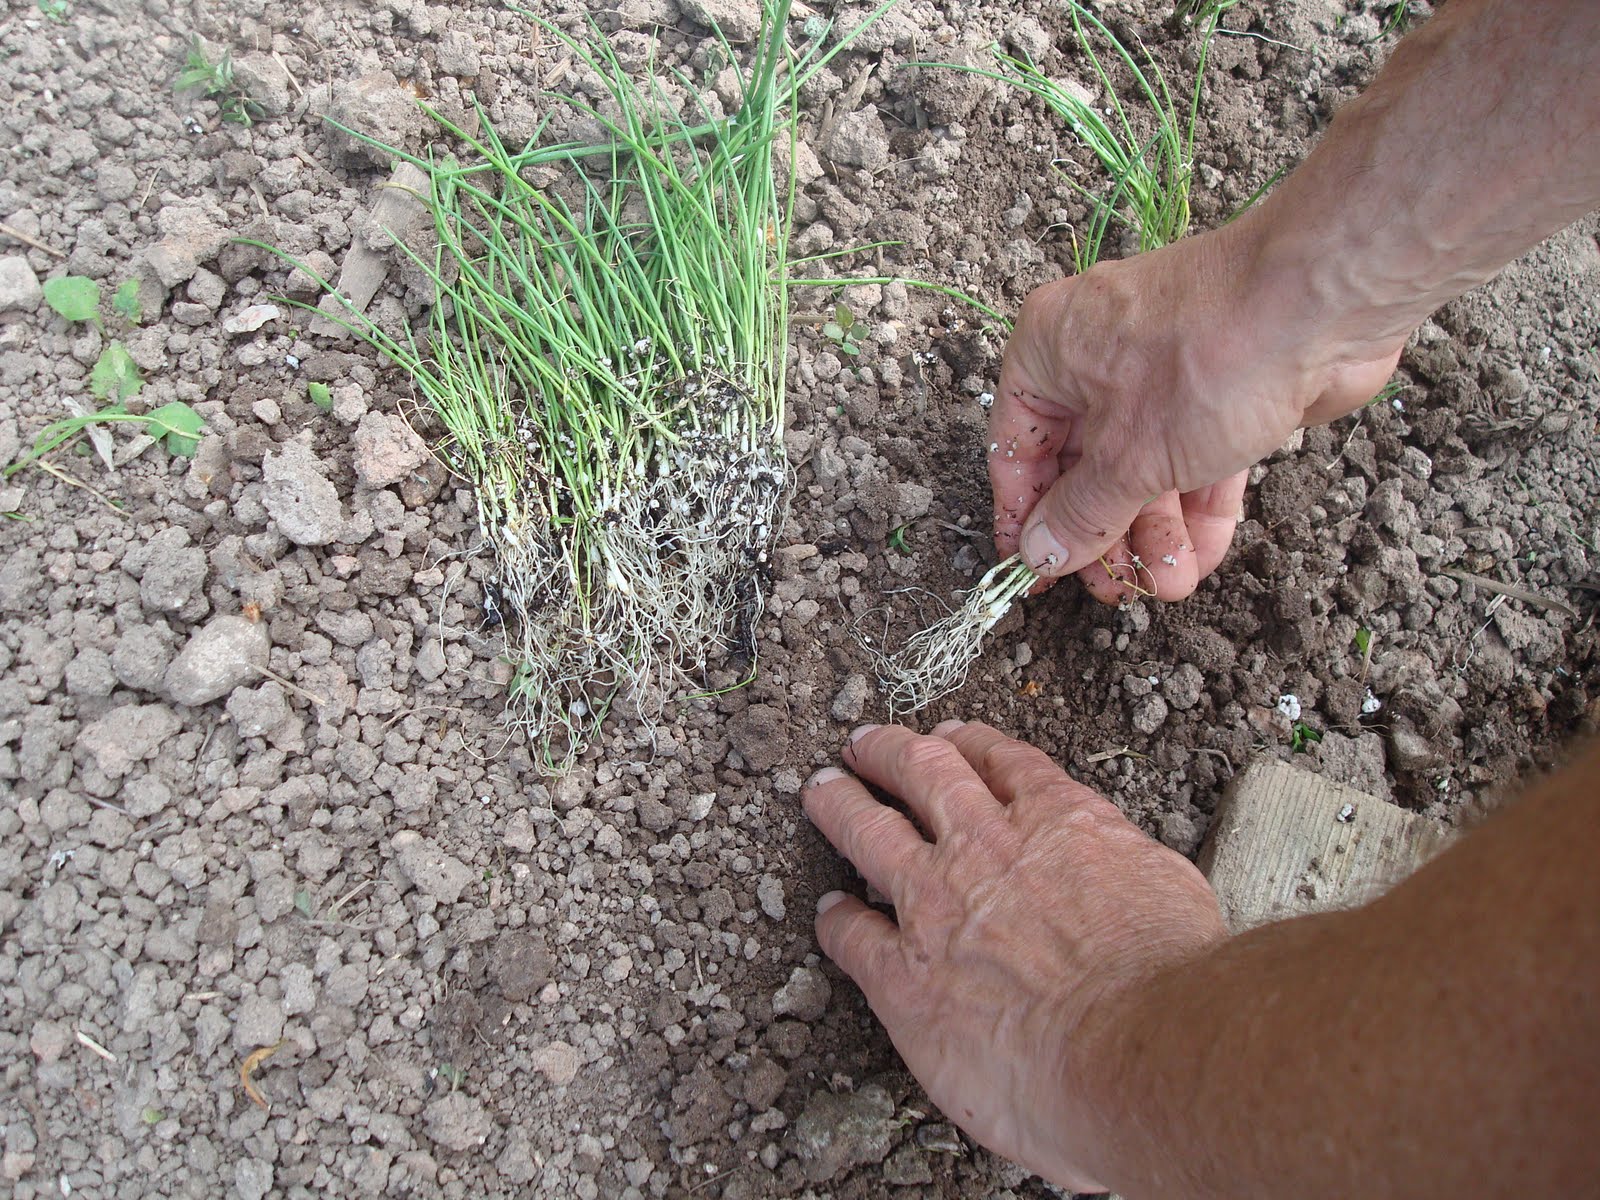
The pole beans have sprouted and will need to be planted this week. I plant them all in peat pots because then I can place them at the bottoms of the poles and know that they will start to climb right away. I planted two kinds but the white variety germinated poorly - variety Helda. The brown variety, Fortex, sprouted much better. This week I will clean off the poles, set them out and plant the bean plants around them and hope this year we do not have another ground hog incident. I have seen immature ground hogs that soon will be out on their own looking for territory to move into - not my garden, I hope.
I did some vegetable grafting last week and I find this to be a VERY challenging process. The tomatoes grew together but they have declined again about the time I want to introduce them to more light. The cubits are even more difficulty so I think I need more information and some better directions; plus I might have to build a real mist chamber to get this to happen. Grafting apples is not nearly as difficult and the success ratio is much better. Oh well, we will just have to read, research, and experiment so more.
Happy Gardening

Sunday, June 19, 2011

Apple Bagging Process

Apple bagging in full process on this tree. I have been plastic bagging apples for over a decade.

I first started with these Japanese fruit bags in the 90's/ Stem at top, wire closure at center.
Then I went to plastic. Nick the bottom edge of the bag on the corner or both corners.
Thin your fruit clusters to one apple every 6 to 8 inches.
You can start bagging as soon as your fruit sizes to larger than a nickle to quarter size.
Partially open the bag and slip it over the fruit - these bags do not have the top edge stripped off as I did with all my bags this year.
Zip the bag closed and staple though the zip to keep the bag closed.
The finished fruit will grow nicely in this bug free environment till maturity.
Apple bagging produced this fine harvest. Nice, hey?

I have been bagging my apples for over 10 years in an attempt to avoid using pesticides. In the past I did a full spray program but that was a lot of work and the need for protecting yourself from the spray begged the question - why spray? So I tried to eliminate all but the first spray to protect the early developing fruits from Plum curculio which as you saw last week can damage the young apples quickly. For the last few years I have been getting my apples bagged before the Plum curculio get at them but this year that just did not happen. I am still in the process of bagging the rest of the fruit and for the most part the damage seems to have stopped. But the next pest is on the way- the coddling moth - so I have to get the job done soon.
In the June 14, 2009 entry I have videos of the complete process but this season I will just go back over the highlights.
I started bagging apples a long time ago with Japanese paper apple bags. This was an interesting process because no one really knew how to apply these highly engineered bags. My wife, who has taught origami, suggested that we think folding in that method and so we did. The bags folded into the neatest pyramidal shapes that easily protected the apples and took windy days well. But getting the bags was a problem and they took much longer to apply than plastic. So on to the next level of extermination.
Regular zipper bags - store brand is good enough - have worked the best for me so I usually buy around 3 to 4 hundred bags and figure on a weeks worth of bagging to get the job done and then I walk away from the trees and wait for harvest.
I nick the bottom of each bag with a blade making a small slice less than a 1/4 inch on the bottom corner. You can do both sides if you want and then avoid having to cut a water filled bag later in summer as rainwater gets into the bag, fills them up as the drain just happens to be on the other side. I stuff my pocket full of bags and go to the tree. I have gotten to wearing my scissors and stapler on a rubber band around my wrist so they are easily accessible as I will need them for working each cluster of apples. The stapler is one of those small types that seems to have been made for this job.
I strip the top part of the bag off - I started doing this on every bag this year because some of my apples have real short stems and the extra bag just gets in the way. If you pull fast the top part usually comes off.
I cut away all but one apple per cluster and bag that apple. You have to get rid of fruit to allow your tree to continue to produce annually. An apple tree will naturally bear heavy on alternate years. But prune a back yard tree correctly, and the apple clusters managed will allow for a good crop every year. Prune to the largest apple in the cluster - that may not be the king fruit. Picking the largest one should ensure that there are enough seeds pollinated in the fruit to allow it to grow to maturity.
Open only one end of the bag. This allows the bag to be zipped closed easier than if the whole bag is opened. Slip the bag over the apple and zip the bag tight to the stem. Staple through the zip closure to make sure that it stays closed for the season. I have sometimes placed an apple in the middle of the bag and stapled on either side but this is extra movement and is not necessarily better bagging. I can usually bag 50 to 60 apples an hour if I am really getting it done.
Once the tree is bagged you should expect some June drop but I bag fruit clusters every 6 to 8 inches and this usually means that any drop should not really affect my crop results.
I like this process, it produces good fruit and is no more time consuming than a bi-weekly spray process and I harvest almost organic apples and recycle the plastic so it's pretty green for me.
Happy Gardening

Sunday, June 12, 2011

Apples Attacked

This is Carolina Allspice (Cylycanthus floridus)
A great shrub that I got as a cutting from my Grandmother years ago.
The fig tree is setting a summer crop.
These are the scars left from the female Plum curculio
Some of these fruits might make maturity but most will drop off the tree. Bagging some might give of a partial crop.
Bunnies ate the zinnias and,
feasted on the fall asters.


I had to make another trip to Arizona to help my parents and my wife and son worked hard to keep things going here. They had real hot weather for part of the week making watering a chore with the cold frames full of seedlings and the newly planted tomatoes and flowers in the garden. Then on Saturday rain helped ease the hard work. Thanks to my wife things looked good on my return.
However, we have been attacked - bunnies on one front and Plum curculio of the other front. The rabbits are small enough to still fit through the bottom of the chain link fence and feast. They have eaten most of one sunflower planting, some of the zinnias, and done a real number on the fall asters. For some reason, rabbits really love the taste of fall asters and will eat them to the ground. Every plant in my yard has been eaten on. Luckily for me I have plenty of Cayenne pepper to sprinkle on the plants to try to stop them. The pepper will burn the leaves a bit but will also burn the bunnies too and they will stop feeding. Get the biggest containers you can get and use it to keep the rabbits off young plants till they get established. Most of the asters will recover except for one plant that has been eaten badly but then that plant is in the way of garden expansion so it may be on the way out anyway. I have some replacement zinnias but no sunflowers unless I discover some extra seed and do them again. I have the traps set and will hope to get these pests out of my space ASAP.
The apples on the other hand have been really damaged. Usually I get the fruit into the plastic bags before we have a real bad infestation of Plum curculio but not this year. The degrees days must have really helped these bugs get going. Unfortunately my neighbor has a large apple tree that they do nothing with and so that is a draw for these apple pests and then the pests also come to my trees. Warm days like we had before I left for Arizona help wake up these beetles from hibernation. For the last few years I have been successful in bagging early enough to eliminate any need to spray the trees for this early pest. However, should this happen again next year I may have to resort to some sort of spray to protect my early developing fruits so as to get them to size for bagging.
I will make next weeks entry a complete apple bagging entry and go through the process so you can see how we do this. I do not have a completely organic yard and garden but we do try to use as few pesticides as we can - but being out of town this season only added to the trouble.
Continual close observation is key to preventing problems with critters that want to invade your garden for free food - so you must be on your guard all the time trying to outwit them if possible.
Happy Gardening

Saturday, June 4, 2011

June Jobs

Sweet Pinks make for a bright spot in any yard.
Bumblebee food are what Chives are - I let the bees feed and then cut the flower heads off so they don't set seeds.
The next tomato job will be the straw mulch.
First I rinse the seedlings in water.
Then I tease them apart into two's or threes.
And then I plant them out - later they will be thinned as bunching onion size.
I planted some Japanese Daikon radishes in a cold frame to try to keep the root maggots out of them as they grow .
Plus, I punched holes and filled them with potting soil to make for straighter roots.
We went to the Green Bay Urban Chicken workshop this week.
This chicken is not full grown but what a pet - just sat there and got petted.

I went ahead and tilled and the garden was still wet in spots so I have lumps galore. However, I am off to AZ again and the work needed to get done.
My son and I drove the stakes and I strung the twine and planted the tomatoes. There are seven rows with 8 to 10 plants per row. The Nebraska Wedding plants were put at the far end because they might be determinate - one catalog says so - and they will not need as much height as the other plants. As per request of my wife I put all the Sugary's in one row right off the yard so she can get at them easily. I inter-planted two rows with my basil plants as last year basil and tomatoes did well together.
I also got the onions in. With the seed onions in flats I rinse the soil off the roots and clump plant them - thinning later to one onion per spot- hopefully. I like this method as I usually plant onions from seed and not sets. Planting sets limits the types one can get so the LaSalle and Patterson varieties are new this year. We will see how they do.
I also got most of the front flower bed and all the Zinnias planted. This summer is the year of the Zinnia so we have planted them in that honor. Besides my grandmother always had a row of zinnias in her garden - usually about 50 or 60 feet of plants so she could have cut flowers.
The tomato grafting failed miserably this spring as the last of the struggling plants died this week. I had wanted to try grafting cubits but my seedlings are just at the graft stage and as I said I must leave town for a week so I will have to start again and see what we can try.
The dames rocket is blooming and I think I am going to use that as my phenology marker for planting tomatoes in the garden. That would give me a constant to work with in the future.
Happy Gardening