 Red Peach is my root stock for this grafting experiment.
 One kind of plastic grafting clip
 I trimmed the cotyledons off, and the next set of leaves.
 I cut the scion and trimmed off leaves here, too.
 To get my cut angles the same, I positioned both stems together and made a new cut.
 When you make the cut remember which is the scion top.
 I placed the clip on the scion.
 Then, I brought the two cut surfaces together.
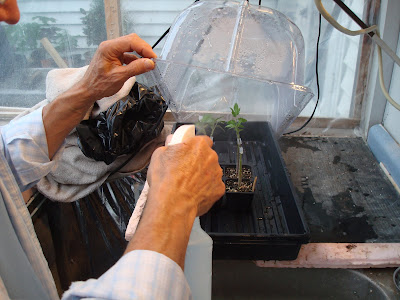
 The grafted plants went into a propagation chamber.
 They must be kept warm, moist, and covered for several days as the stems grow together.
 The chamber is covered here with a black plastic bag
 And darkened for what is recommended - 4-5 days - after that we will see.....
Earlier this season, as I was reading my seed catalogs, and I came across a page devoted to tomato grafting seed stock and supplies. Imagine my surprise: What? - why graft tomatoes?
Well all you have to do is Google the topic and the answers will appear. This is a horticultural procedure that began in the 1920's in Japan and Korea and has continued ever since. Major portions of vegetable crops in Asia and even in this country are now being grown from grafted stock. Even the tomato farmers in Missouri have Internet information about grafting tomatoes and why they are using the process. You can even buy grafted plants at some English gardening catalog sites for this the second year of such offerings.
As a result of these findings, I decided to give this procedure a try. My experience with apple grafting has been acceptable so why not try these herbaceous plants. I watched as many on line videos as possible. I got a few grafting clips and located some aquarium tubing along with some razor blades as my cutting tool. The root stock I choose was some of my own seed - my Red Peach tomato. I choose this one because as a producer, this plant really makes a great root system and just keeps growing all season long. I have to cut the tops off the plants to get all the fruit set to ripen in the fall. For grafting stock, I chose some of my old seed just as trial - Sugary, Grubs, and Pineapple. As you go through the pictures above, realize that this is my first time doing this grafting and as in anything - practice makes perfect.
I grew the root stock and the scion stock; trimmed off the cotyledons and cut both stems together so as to get the same angle of cut; slipped the clips or cut tubes over the scion and then onto the root stock; misted them well and placed them into a tray with dome cover under black plastic just like the directions in most of the sites suggested. I used a heat mat to keep the chamber warm and mist the inside at least twice a day. After 4 or 5 days I will get to see if anything took.
Take a moment to go to the Johnny's Selected Seeds web site and watch the tomato grafting clip there - this guy has been doing grafting for many years! It's like someone has been doing all this fun garden stuff in secret.
I did some other gardening this week to but the grafting was the most challenging and most exciting.
Happy Gardening

I'm embarrassed to admit it, but I'd never heard of tomato grafting. Just like I'd never heard of pelletized lettuce seed. I learn something new every time I visit your blog. Thanks.
ReplyDeleteHi Richard,
ReplyDeleteThat is what we try to do - get out as much information as we can about what we are doing and what we have discovered. I never heard of grafted tomatoes till this year and it seems many other places in the world knew about the process a long time ago!
Happy Gardening
Richard,
ReplyDeleteI am designing a book on growing giant tomatoes. Would it be alright for me to use some of your images on grafting?
Regards,
Don Langevin